
This was one of those moments.
... I have found, in MY opinion, one of the BEST ways to convert your photos to B&W.
So here is the FINAL black and white image....
Oh, black and white. You slightly tricky thing you. I don't know about you guys, but I use to have a little battle with my black and whites. We'd arm wrestle every now and then, and sometimes I'd walk away in victory. Just enough contrast and just enough brightness. But then other times... my black and white felt CHEAP. You know what I mean.
I stumbled on this tutorial (via Michelle Herrick) that completely explained WHY and how presets/actions can sometimes change your photos ... for the worse. When I created my own B&W preset on Lightroom -- I was pretty excited. Then I later realized it just didn't work with every photo.
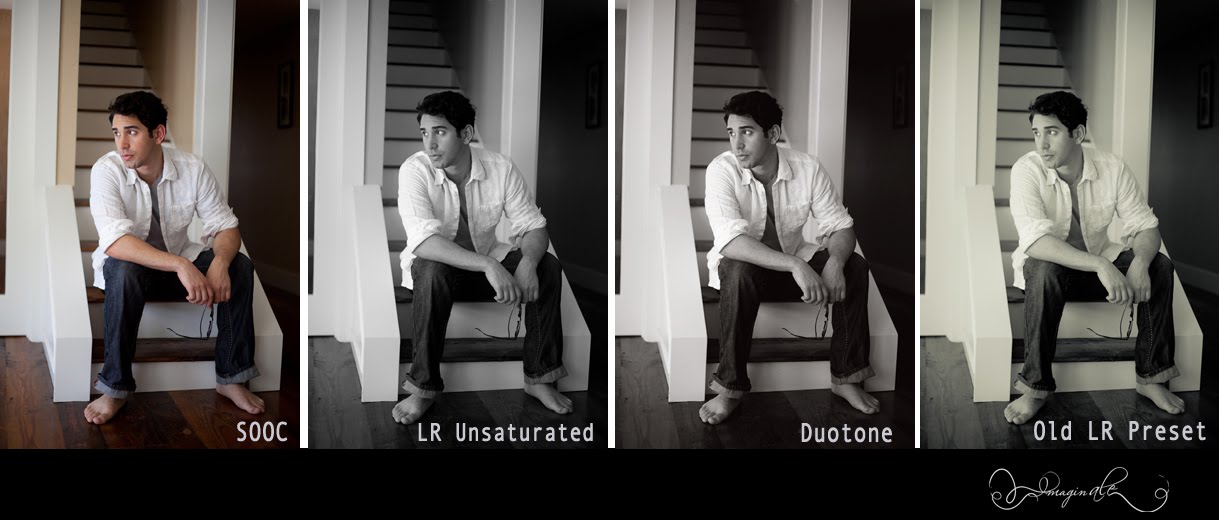
Let's take the original...
I loved my original exposure straight out of the camera (SOOC). And while I knew I wanted this in B&W, I was afraid it would take away the editorial feel of the image. The cleanliness. Let me show you.
This is a B&W preset I made on Light Room that I use for most of my B&W's...
Blegh. I mean, it's not horrible. Clearly I've been using this preset for a long time. But I knew this wasn't the style I was going for. When you look at the new B&W conversion (duotone) I'm using beside the LR preset -- you can REALLY see the difference then:
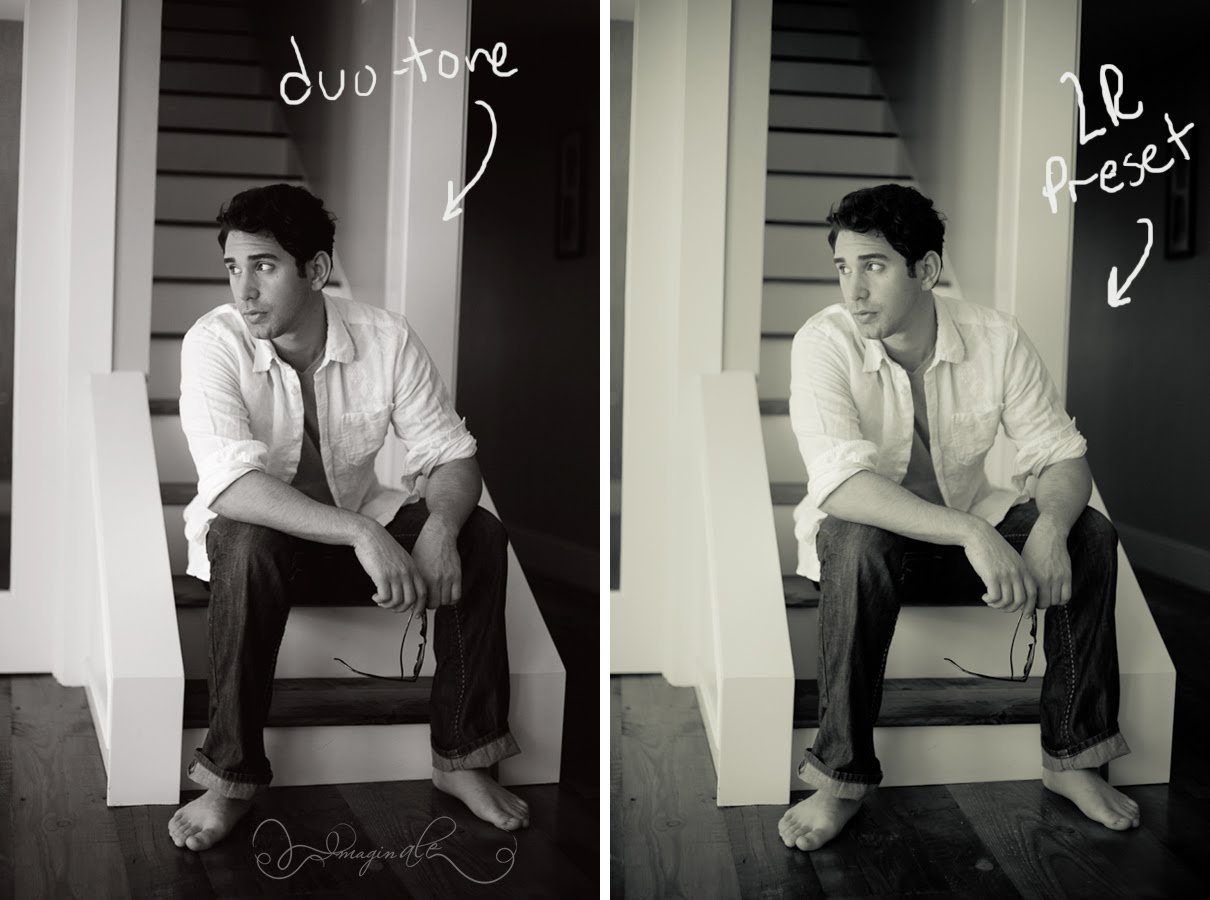
Look at the details (shadows) on his face. You lose a lot of that illumination on my LR preset (photo on the right). Plus, to me, my old Lightroom preset looks too processed. And because in this particular case I REALLY liked my original lighting (exposure), I didn't want my preset to change that.
SO. How do you do this? Here is the awesome tutorial by Jake Garn:
Boom. Exciting, right?!
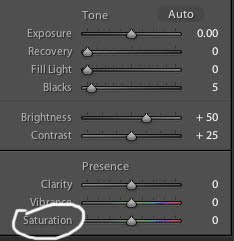
Just to reiterate his point, typically with presets on Lightroom, we mess with the saturation level found on the right-hand panel -- which is then slid all the way to -100 (i.e. unsaturated).
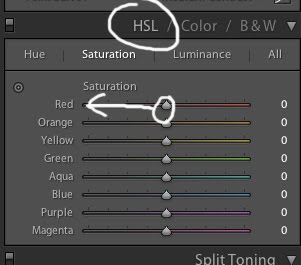
Verses using your HSL panel and manually sliding ALL of the hues to -100.
You can see here the image (on the left) when I took the original photo and slid all my HSL hues in Lightroom to -100 and then the image with the duo-tones on the right...
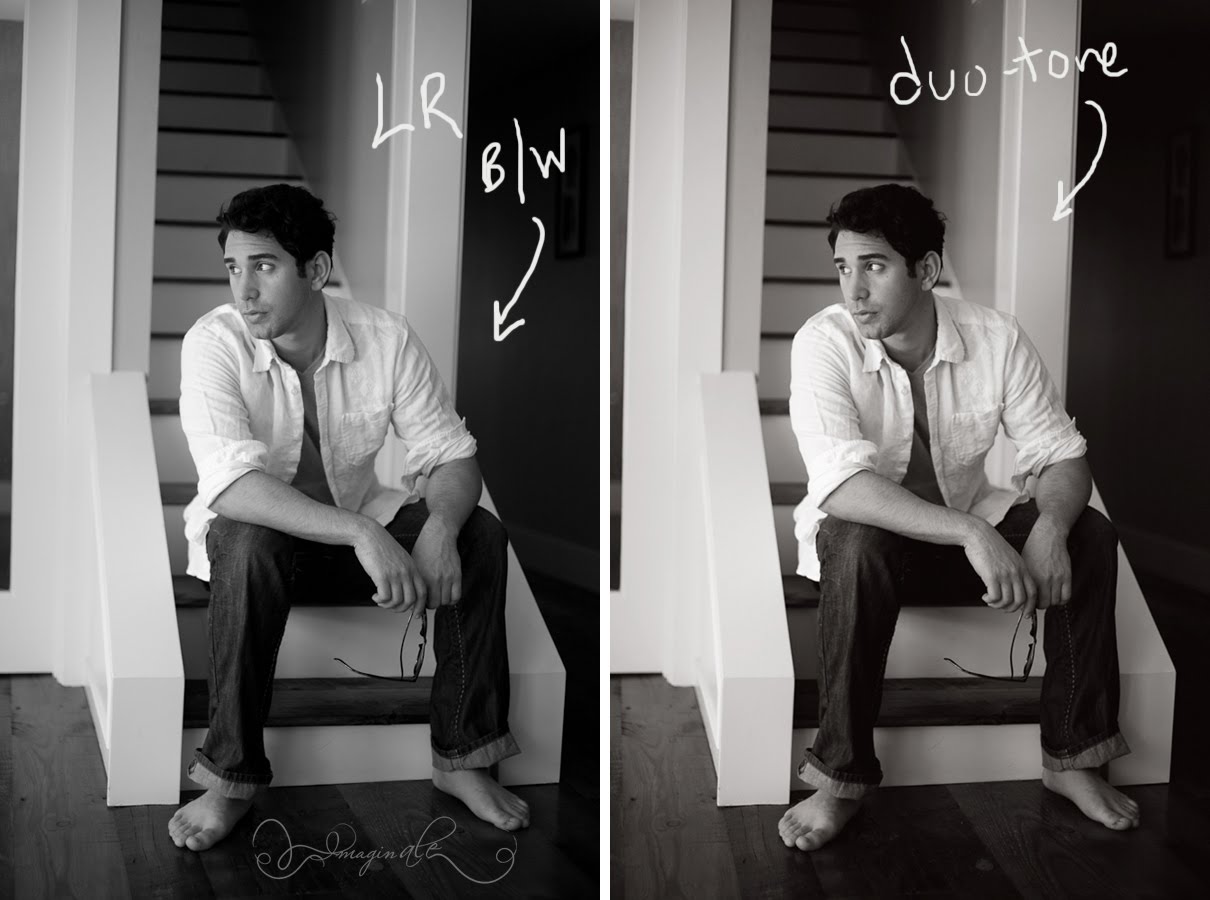
They're very similar, right? The only difference is there is a "tone" to the one on the right, but my exposure hasn't changed. I used the Gray/Black duo-tone for my final image because that's more of my style.
If your original photo isn't exposed correctly, I would suggest fixing that first before starting the duotone process. Play around with the duotone presets on Photoshop and find what does and doesn't work for you. I know people mentioned using LR's split toning, but Photoshop came with some awesome Gray/Black duo-tone presets already.
One last look at the transition of the edits...
If you're a pro or advanced photographer looking for some good B&W's -- try this! Seriously, GO. I promise it's super easy. And if you like it, share with friends and let me know how it worked out for you!! :) My photoshop didn't have the presets tab, so I actually had to hunt for it. Let me know in the comments if you have any problems or q's and I'd love to help!
This isn't a one-size-fits-all... but to me this was one of those stop-then-wiggle-with-it moments. And who knows, it might be for you too ;)
You know what's funny? I had come across this like a MONTH ago and it wasn't until I was doing this model's photos that I was like "This is it. I just DO NOT like my b/w!!" and then I remembered the tutorial and thought.. "what the heck? Can't hurt trying, right?" And Omgosh, WHY DID I WAIT SO LONG?! haha.
ReplyDeleteDefinitely ask away if you come across any probs though :) AND you have to show me a before and after once you try it!! YOU MUST!
You know whats interesting...I looked at this on my iPhone then I looked at it on my Dell laptop, but the difference wasn't as noticeable on my laptop. I wonder how much of the difference has to do with color scheme difference between Dell and Apple? Either way...I like the duotone much better!
ReplyDeleteJust started playing with duotones just a couple days ago and was looking around the internet for more reading on them. This was great, and I loved the links you gave as well.
ReplyDeleteYour work is beautiful, by the way.
Just started playing with duotones just a couple days ago and was looking around the internet for more reading on them. This was great, and I loved the links you gave as well.
ReplyDeleteYour work is beautiful, by the way.
I just found this post!!! THANK YOU!
ReplyDeleteI was just wondering how, after all this time, your black and white processing has changed? Are you still just as excited about this?
ReplyDeleteWorkflow-wise, it isn't fun to have to open up every image in Photoshop. I'm wondering how different a focus of converting to B&W using Saturation sliders in Lightroom, and then manipulating the lights and darks to achieve an effect that is nearly the same tonally.
I, too, get frustrated with my black and white misses. I realize that different light will render different images, and so I am amazed at those who seem to have such a cohesive look through all their different photographs.
Hey Brandon!
DeleteNot sure if you'll come back and get this, but I wanted to follow up :) I absolutely LOVED this technique I wrote about on this blogpost, but at the same time.. I really hated having to open up every image in Photoshop. I completely agree, workflow-wise, it just wasn't making sense and not worth it. Truth be told, after purchasing VSCO - while I don't love EVERY preset, the B&W's are absolutely stunning (to me). And when it come to editing, workflow is key!
My thoughts on the consistency of the editing -- while you can't always control your light, you can definitely control HOW you use the light. It is key to always find the perfect light first before posing clients. But that's if you're shooting people (which is what I do). I always look for light first because I know this will allow me to achieve a consistent look.